10 GERM MAGNETS
LURKING IN SOME
ORDINARY PLACES IN
YOUR HOME
These 10 germ magnets lurking in ordinary places in your home are not usually on our list of routine cleaning chores. Dusting, vacuuming, bath, kitchen, and floor cleaning are chores which must be done on a regular basis in order to maintain a clean and healthy home. Things can get out of hand very quickly if any of these are skipped for awhile, especially if your home contains children and pets!
But do you realize there are at least 10 germ magnets lurking in some ordinary places we don't usually pay enough attention to? Here are some that really may require some investigation:
#1 Cell Phones and Tablets
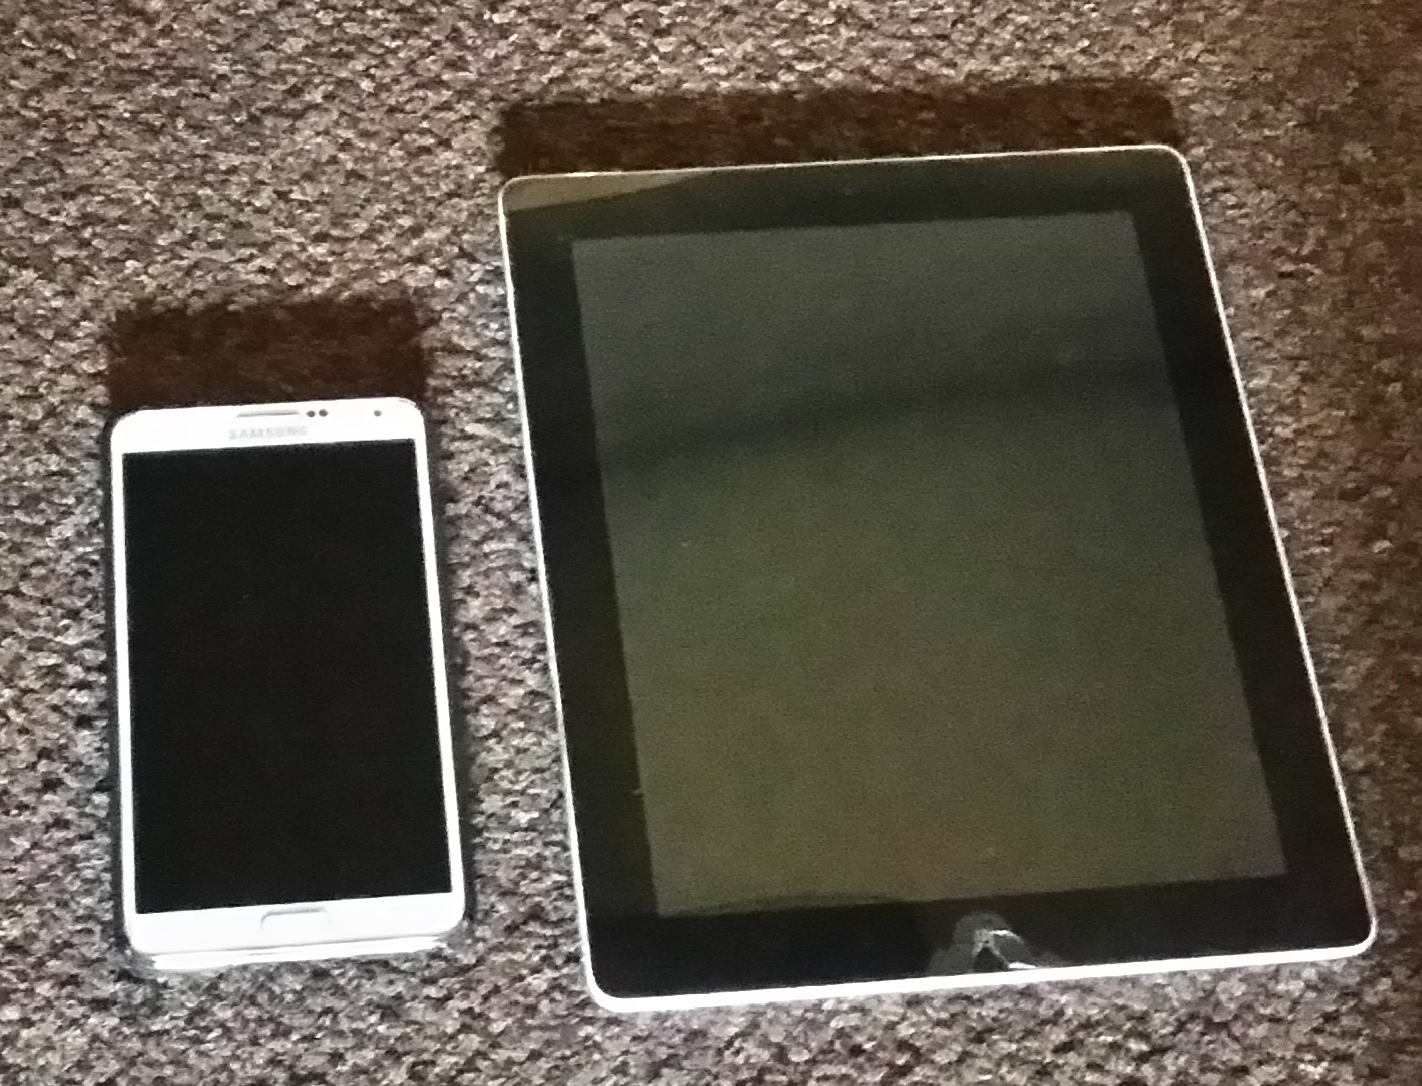
We have become a society that depends more and more on our cell phones and tablets to communicate with the rest of the world. Since hardly anyone washes their hands before touching these gadgets, they can contain more germs than the bottom of your shoes or a toilet seat!
Do NOT use glass cleaner, alcohol, ammonia or other harsh cleaning agents on your cell phone or tablet touchscreens. They can destroy the protective coating. There are cleaners and wipes available specifically to clean the touchscreens of your favorite devices.
Clean tablet screens at least once a week and cellphone screens every other day. Wiping with a damp microfiber cloth once a day will also help to keep these screens clean.
For the solid parts and keyboards of cell phones and tablets, use a damp cloth and/or a cotton swab (for hard-to-reach places) with a 40/60 alcohol to water mixture.
#2 COMPUTER KEYBOARDS
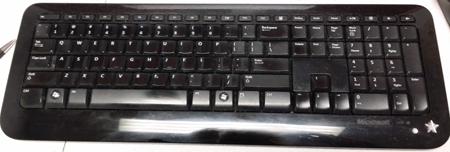
Computer keyboards, with all the tiny hidden places dust, dirt, and grime can hide can also contain more bacteria than a toilet seat!
It is relatively easy to clean computer keyboards and it should be done periodically.
TO CLEAN THE KEYBOARD...
1. Make sure the computer is turned off and, if wired, unplug it.
2. Turn it or tilt it upside down and shake it to get rid of loose debris.
3. A can of compressed air can also be useful to help remove loose debris.
4. You can also take an approximately 2 1/2" piece of adhesive tape and run it up and down between the keys to collect dust.
5. Don't be afraid to use a vacuum hose to get up stubborn debris.
6. Use disinfectant wipes or a small cloth dipped in alcohol (test the alcohol on the keys first to make sure it won't discolor them) to clean the keys.
7. Cotton swabs and toothpicks can also come in handy.
8. Make sure to use a dry, lint-free cloth to polish the keys after cleaning.
KEYBOARD REALLY BAD...
If your keyboard has really gotten bad and if the keys are removable, you will then have better access to the board underneath the keys after you remove them.
1. Before removing the keys, make sure to take a photo of the keyboard so you will be able to easily replace the keys after cleaning!
2. Most keys can be easily removed with the help of a small screwdriver or a butter knife but check your keyboard manual first to make sure. Please Note: Some keys, such as the Space bar, Enter, Return, and Shift keys may be permanently anchored.
3. Put the keys in a bucket of warm, soapy water while you work on the keyboard.
4. For sticky residues, use alcohol on a paper towel or Q-tip.
5. When done with the board, wipe the keys with a lint-free cloth.
6. Allow both the keys and the board to dry completely overnight.
#3 REMOTE CONTROLS
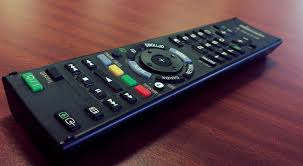
You may not realize this but it is not just the remote controls in your own home but ones in hospitals, hotel rooms, and other public places have surfaces that contain the most germs. These consistently test positive, especially for cold viruses.
To clean these gadgets, first remove the batteries. Gather the following ingredients:
- A dry toothbrush
- Rubbing alcohol and water (50/50 mix)
- Cotton swabs
- A microfiber cloth
Start to brush out any debris stuck between the buttons using the toothbrush. Work your way from the top to the bottom of the remote.
Lightly spray the cotton swab with the alcohol and water mix to get into crevices.
Gently wipe away dust, dirt, and grime using the microfiber cloth to thoroughly dry all areas.
Replace your batteries and your remote is clean and ready for use!
#4 LIGHT SWITCHES & DOOR KNOBS
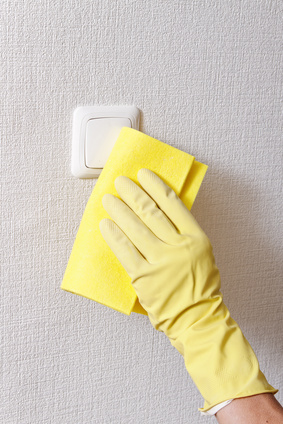
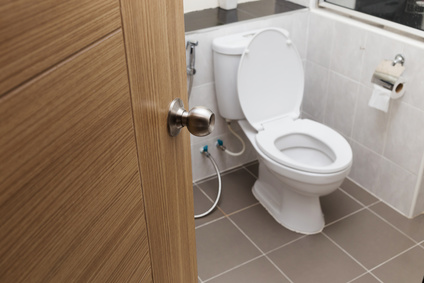
We know not everyone washes their
hands after using the bathroom but everyone does touch that door handle and,
most likely, the light switch. These are areas we often forget to clean and
disinfect.
Make sure to choose a nontoxic disinfectant for safety. You can actually make one yourself. Using a bottle of hydrogen peroxide (3%) onto which you have put a spray nozzle and a spray bottle of undiluted white household vinegar. (Note: Hydrogen peroxide is sensitive to light so keep it in its store-bought brown bottle). Do not combine the 2 because the resultant mixture will not be as effective.
Mist those light switches and door handles with a spray of hydrogen peroxide first and then the vinegar and then wipe dry with a microfiber cloth. Do this once a week on high-traffic doors such as kitchens and bathrooms and once every few weeks for others.
NOTE: This technique with the 2 sprays can be used directly on food or use it to disinfect anything in your house. If you do use it on fruit or vegetables, rinse the items with water to remove any remaining flavors.
#5 THE DISHWASHER
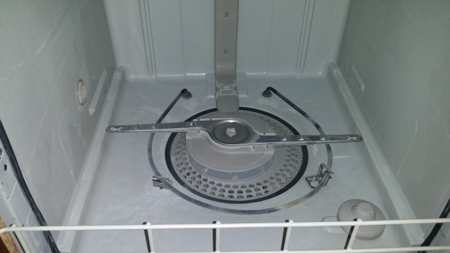
WHY WOULD MY DISHWASHER NEED CLEANING? If it has hot water and soap going through it regularly, why worry about cleaning it? The truth is those bits of food, soap scum, and grease really do add up causing your dishwater to look and smell bad. It can also make a difference in its ability to clean efficiently.
HERE IS WHAT YOU NEED TO DO TO GET THAT DISHWASHER BACK ON TRACK:
1. Take out the bottom rack and check the drain for any little bits of food that might be stuck.
2. Place a dishwasher-safe cup filled with white undistilled vinegar on the top rack. Run the dishwasher through its cycle with the hottest water possible with just the cup of vinegar in it. The vinegar will help wash away the loose bits and the grime, while sanitizing and removing musty odor.
IS THERE STILL AN ODOR?
Then sprinkle some baking soda in the bottom of the machine and rug it through a short cycle. The baking soda will help to freshen the smell and help remove any remaining stains.
WHAT ABOUT MOLD & MILDEW?
As long as the inside of your dishwasher is NOT stainless steel, just add up to a cup of bleach in the bottom of the dishwasher and run a full cycle.
A COUPLE MORE TIPS...
1. If you have a garbage disposal, make sure to run it before attempting to clean your dishwasher. This is to clean the drain, since they both use the same drain.
2. Are you one of those who is a bit OCD about washing dishes before putting them into the dishwasher? Did you know that dishwashing detergent NEEDS a certain amount of dirt and grease in order to do its job? Otherwise, it actually foams up during the cycle which is not good for your dishwasher.
#6 THE KITCHEN SINK
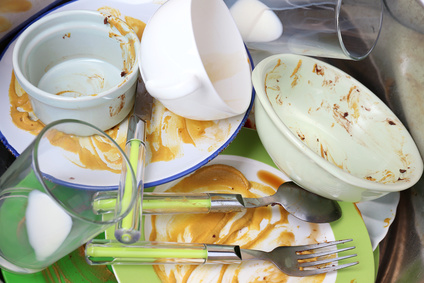
The sight of dirty dishes in the sink is a familiar one to most of us. In fact, your kitchen sink may actually have more E.coli bacteria in it than what remains in the toilet after flushing!
With the amount of moisture and food particles left on dirty dishes and put down the drain, the kitchen sink is a great feeding ground for bacteria.
The kitchen sink should be cleaned daily with a disinfectant product made specifically for the kitchen. Lemons and vinegar are not as effective with this particular job so don't use them as an alternative.
Quick tip: While you are cleaning the sink, put that dish sponge in the microwave on high for 2 minutes once a day. If you use a cloth to clean the dishes and sink, make sure to soak it in a bleach solution and cold water in the sink for about 5 minutes to remove stains and disinfect it.
#7 CUTTING BOARDS

Cutting boards today come in many different sizes and shapes and can be made of wood, plastic, glass, etc.
It is not enough to just rinse your cutting board, no matter what it is made of. Poultry and raw meat can leave behind bacteria which are one of the most common causes of food-borne illness such as salmonella and campylobacter.
Your best bet to avoid cross-contamination is to use one cutting board for meats and another for vegetables. These boards can be cleaned with a disinfectant made specifically for the kitchen or put in a dishwasher to clean. If you use wooden cutting boards, make sure they have been treated with antimicrobial resins.
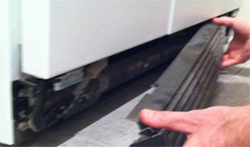
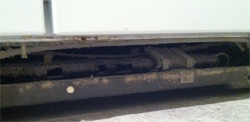
#8 REFRIGERATOR COILS
Guess where one very small area of your kitchen is that when cleaned on a semi-yearly basis will actually save you money?
Did you know that if you spend 15 minutes once every six months to clean your refrigerator coils, you will not only extend the life of that appliance, but you will eliminate most refrigerator malfunctions and keep it running at maximum efficiency? That will save you money!
Those refrigerator coils can be easily overlooked, yet this area, which is so close to the floor, can accumulate a great amount of dirt, dust, pet hair, and dander over time. The compressor must run longer, and work harder than it should when the coils are clogged with dirt, dust, and animal hair. Please note: If there are pets in the home, the procedure may have to be done more than just twice a year.
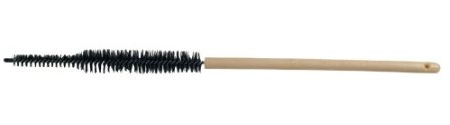
The procedure to clean the refrigerator coils is simple but does regard several steps to complete. It is only necessary to have on hand an inexpensive bendable coil brush (can be found on Amazon) and a vacuum with a hose. The coil brush is bendable so it will fit in tight areas, and it is designed to grab and hold the dust and dirt. You can push it into tight spots and in between all of the coils without harming them.
Here is the procedure:
- Pull out the refrigerator.
- Unplug the electrical cord.
- Remove the toe grille to access the coils.
- Use your coil brush to pull out dirt and hair from the coils.
- Use your vacuum hose to clean up the dust as you go and vacuum the brush each time you pull it out.
- Continue until no more dirt is pulled out with the coil brush.
- Plug fridge back in, push it back in place and replace the toe grille.
And that's it! Your fridge will save you money by running longer and more efficiently.
#9 BED PILLOWS
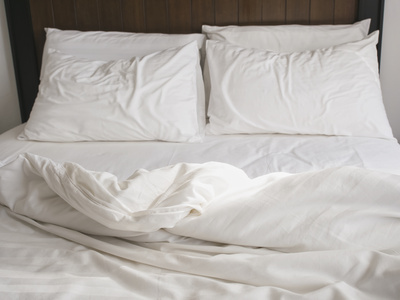
How often do you wash your bed pillows? Do you actually ever wash your bed pillows, or do you end up replacing them instead? We know they can harbor all manner of dribble, drool, sweat, flaked skin, dust, dust mites, and dirt! But, did you know most bed pillows are washable? Yes, the majority of them can be and should be washed and dried at least 2 times per year!
A FEW CAVEATS BEFORE YOU WASH YOUR BED PILLOWS…
- Always read the care label on your pillow (if it has one) and follow the directions for cleaning.
- Pillows can be washed in top loading as well as front loading washers but only wash 2 at a time because they need a lot of water to get thoroughly clean. Just 2 at a time will also keep your washing machine balanced properly.
- Foam or cellulose pillows should NOT be washed. They can be dry cleaned, vacuumed on both sides with your vacuum's upholstery tool on low suction, put in the dryer on no heat or air-only for about 20 minutes or spot-cleaned with a cloth dipped in a mild sudsy solution, rinsing with a damp cloth. (Make sure the pillow air dries completely before using it).
- As a general rule, to help your pillows stay cleaner longer, use pillow protectors and wash them regularly; monthly is best.
WASHING PROCEDURE
- Place the pillows in the washer, 2 at a time. When washing down or fiberfill pillows in a top-loading washer with an agitator, place the pillows in vertically to help prevent the pillows from wrapping around and getting damaged by the agitator
- Set the washer to a gentle, warm water cycle at its largest capacity.
- Use only a gentle liquid detergent without harsh ingredients, stain removers or perfumes. If at all possible, put the detergent in and allow the washer to begin filling before putting in the pillows. (This cannot be done with a front-loading washer).
- After the wash cycle is completed, run the pillows through the rinse cycle again and through the spin cycle two times so any excess water will be removed.
DRYING PROCEDURE
- Dry pillows made of synthetic materials on a low to medium heat cycle avoiding high heat.
- Natural materials and down should be set on air dry only.
- If you have attempted to wash your foam pillow, it should be hung on a line to dry since the material may melt in the dryer.
- You can always add a few tennis or other dryer balls thrown in with the pillows to help the fibers to fluff up.
- Make sure to stop the dryer every 30 minutes to rotate the pillows and make sure they are drying thoroughly.
And that is all there is to it! Next time, when you think it's time to replace those bed pillows, try washing them first.
#10 DRYER LINT FILTER
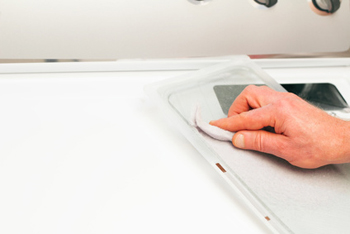
When you empty the lint trap in your dryer after each load, you are helping with the air flow and lessening the danger of potential fires. But if you actually thoroughly WASH the lint filter every 6 months or so, you will not only further improve the performance of your dryer, but you will also increase its lifespan!
HOW THE DRYER WORKS
In a dryer, fresh air is pulled in and heated in order to evaporate the moisture in your clothes. All that warm air and moisture pass through your lint filter along with everything that was picked up during the tumbling motion. The air is then sent outside, and another cycle of fresh air is brought in.
PURPOSE FOR REGULARLY EMPTYING THE LINT FILTER
The purpose of emptying out the lint filter between uses is to avoid restricting the flow of the moist, warm air which will prevent the dryer from working efficiently and may even eventually (if the buildup is severe) cause a fire.
BEWARE OF DRYER SHEETS
Those of you who use dryer sheet with each load of wet clothes should be aware that these sheets are treated with a silicone-based film that can also build up on the lint filter causing the dryer to work less efficiently. To prove this, take your lint filter to the sink and run some warm water over it. If there is just a small amount of water passing through the screen or if the water is pooling on top, the film is there.
PROCEDURE TO WASH THE LINT FILTER:
- Remove the lint filter.
- Wash the screen with warm soapy water and you may also need a soft old toothbrush to gently scrub the screen.
- Hand dry the screen but leave it out of the dryer until it is completely dry.
- Reinstall the filter into the dryer.
The above procedure should be performed at least once every 6 months.
Don't forget to have your dryer vents checked and cleaned once every year as well.
"The Cleanest Clean You've Ever Seen."
by
ABC Oriental Rug & Carpet Cleaning Co.
130 Cecil Malone Drive Ithaca, NY 14850
607-272-1566

Click Here for Directions to Our Facility in Ithaca, NY
HOURS:
Mon - Thurs: 8:00 - 5:00
Fridays 8:00 - 4:30
Saturdays 10:00 - 1:00
Check out our latest Newsletter here...

New informative articles every month.
Special Discounts!
Sign Up With the Button Below:
TABLE OF CONTENTS
#4 LIGHT SWITCHES & DOOR KNOBS
